Accurately calculating the required heating capacity for a thermal oil heater is a foundational step…
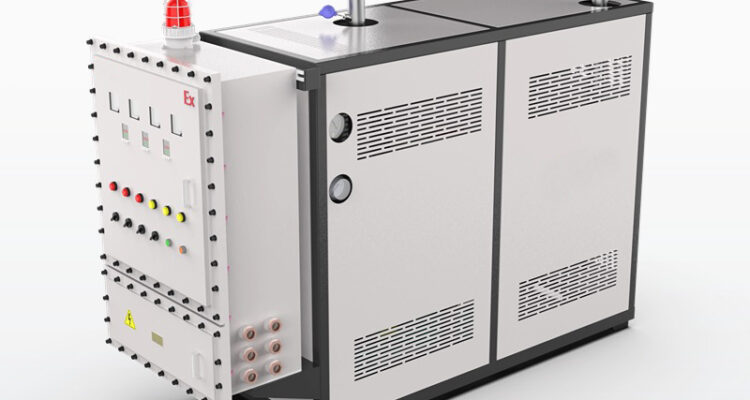
thermal oil heater cleaning method
Thermal Oil Heater Cleaning Method — How to Remove Sludge, Carbon, and Debris Without Destroying Your System
A dirty thermal oil heater runs hotter, burns more fuel, and fails sooner. The question is not whether you should clean it — it is how you clean it without making things worse. The wrong cleaning method can damage tubes, strip seals, or leave chemical residue that poisons your oil. The right method restores efficiency and adds years to your equipment life.
When Your Thermal Oil Heater Actually Needs Cleaning
Cleaning on a fixed schedule regardless of condition is wasteful. Cleaning too late is expensive. The sweet spot is condition-based cleaning — you act when the data tells you to act.
Watch for these signals. Flue gas temperature rising above baseline by 10% or more means your heat transfer surfaces are fouled. The burner has to work harder to push the same amount of heat through a layer of carbon and sludge. Fuel consumption climbs. Oil temperature takes longer to reach setpoint. Pump current draws higher because the oil has thickened with suspended debris.
Visual inspection of oil samples also tells the story. Fresh thermal oil is clear and amber. If your sample looks dark, cloudy, or has visible particulates floating in it, the system needs attention. Lab testing of acid number, viscosity, and flash point gives you hard numbers to base your decision on.
Most operators clean their systems every 12 to 24 months depending on operating temperature and oil type. High-temperature systems above 300°C degrade oil faster and need more frequent cleaning.
Chemical Cleaning — The Most Common and Effective Approach
Chemical cleaning is the industry standard for removing carbon deposits, sludge, and oxidized oil from the internal surfaces of a thermal oil heater. It works by circulating a cleaning solution through the system at elevated temperature, dissolving the buildup without disassembling anything.
How the Chemical Cleaning Process Works
The process starts with a complete oil drain. You cannot clean effectively while dirty oil is still in the system. Drain the oil into a holding tank for disposal or re-refining. Then isolate the heater from the rest of the loop — close all valves so the cleaning solution stays inside the heater and connected piping.
Next, prepare the cleaning solution. The chemical is typically a proprietary blend of surfactants, dispersants, and solvents designed to break down carbon and dissolve sludge without attacking the metal surfaces. The concentration depends on the severity of fouling. Light fouling needs a lower concentration. Heavy coking requires a stronger mix and longer soak time.
Fill the system with the solution and heat it to operating temperature — usually between 60°C and 90°C. Never exceed the maximum temperature rating of your seals and gaskets. Circulate the solution for 8 to 24 hours depending on how bad the buildup is. During circulation, the chemical attacks the carbon layer on the tube walls and breaks it into small particles that stay suspended in the solution.
After the soak, drain the solution. You will see dark, sludgy liquid coming out — that is the fouling leaving your system. Flush with clean water or fresh thermal oil until the drain runs clear. Then refill with fresh oil and bring the system back online.
What to Watch Out For During Chemical Cleaning
The biggest risk is chemical compatibility. Some cleaning agents attack certain metals, especially aluminum and copper alloys used in heat exchangers and pump components. Always verify that the chemical is safe for every material in your system.
Temperature control matters too. If you overheat the cleaning solution, it can break down into corrosive byproducts that attack the tube metal. Stay within the recommended temperature range and monitor it closely.
Seals and gaskets are vulnerable. Prolonged exposure to strong solvents can swell or degrade rubber seals. If your system uses elastomeric seals, reduce the soak time or use a milder formulation. Replace seals after cleaning as a precaution — they have absorbed chemicals and may not last as long afterward.
Mechanical Cleaning — When Chemicals Are Not Enough
Some fouling is too thick or too hard for chemicals alone. Carbon that has baked onto tube walls at high temperature forms a hard, glassy layer that resists chemical attack. That is when mechanical cleaning becomes necessary.
High-Pressure Water Jetting
This method uses pressurized water — sometimes mixed with abrasive media — to physically blast the buildup off the internal surfaces. It is effective for heavy carbon deposits on accessible tube sections.
The process requires partial disassembly. You open the heater and direct the jet nozzle at the fouled surfaces. The pressure must be high enough to remove the deposit but low enough to avoid eroding the tube metal. Operators typically use pressures between 100 and 300 bar depending on the tube material and wall thickness.
High-pressure jetting works best on straight tube sections. Bends, elbows, and tight spaces are harder to reach. It also generates a lot of waste water that needs proper disposal.
Rotary Brush and Scraper Cleaning
For tubes that cannot be jetted, rotary brushes or mechanical scrapers do the job. A flexible brush on a long shaft is fed through the tube and rotated to scrub the interior. Scrapers physically scrape the deposit off the wall.
These methods are slower than jetting but more precise. They work well in heat exchanger tubes and coiled sections where water jets cannot reach. The downside is that they can score the tube interior if used aggressively. Always use the right tool for the tube material — steel brushes on steel tubes, nylon brushes on softer alloys.
Flushing and Oil Replacement — The Final Step That Most People Skip
Cleaning the heater is only half the job. If you put fresh oil into a system that still has residue floating in it, you are just diluting the problem, not solving it.
System Flushing Procedure
After chemical or mechanical cleaning, flush the entire loop — not just the heater. The expansion tank, pump, piping, and any connected heat exchangers all hold residue. Open all low points and drain valves. Circulate clean thermal oil or a flushing oil through the system at full flow for several hours. Change the oil at least two or three times during the flush. Each change removes more suspended particles.
Use a fine mesh filter on the pump suction during flushing. Check it frequently and replace it when it clogs. That filter is catching the debris that would otherwise recirculate through your clean system.
Oil Replacement and Commissioning
Once the flush oil runs clean — clear, amber, no particulates — drain the system and refill with fresh thermal oil. Use oil that matches the original specification exactly. Mixing different oil types creates compatibility issues that accelerate degradation.
After filling, run the system at low temperature for several hours. Check for leaks at every joint, flange, and seal. Monitor the oil level in the expansion tank — the system will absorb some oil during the initial heat-up as air purges out. Top off as needed.
Bring the temperature up gradually over 24 to 48 hours. Do not jump straight to operating temperature. Rapid heating causes thermal shock to the tubes and can crack welded joints.
Cleaning Frequency — How Often Is Enough
There is no universal answer. It depends on your operating temperature, oil type, system design, and how hard you run the heater.
Systems running above 300°C need cleaning every 12 months or even more often. Lower temperature systems below 250°C can stretch to 18 to 24 months. If you use a high-quality synthetic oil with good oxidation stability, you extend the interval. Mineral oils degrade faster and demand more frequent attention.
Track your flue gas temperature and oil analysis results over time. When flue gas temperature creeps up by 5 to 10% from baseline, schedule a cleaning. When the acid number in your oil sample rises above the recommended limit, it is time to clean or change the oil.
The cost of a scheduled cleaning is a fraction of the cost of a tube failure or a fire caused by overheating. Treat cleaning as an investment, not an expense.
Related Posts