Accurately calculating the required heating capacity for a thermal oil heater is a foundational step…
thermal oil heater oil leakage problem
Thermal Oil Heater Oil Leakage: Where It Comes From and How to Stop It
Oil leaking from a thermal oil heater is never a small issue. It is a fire hazard, an environmental risk, a production stoppage waiting to happen, and a sign that something in the system has already failed. The fluid does not just appear out of nowhere — it escapes through specific weak points that have been degrading over time. Knowing where those points are and why they fail is the only way to stop the leak before it becomes a disaster.
The Main Locations Where Leaks Actually Happen
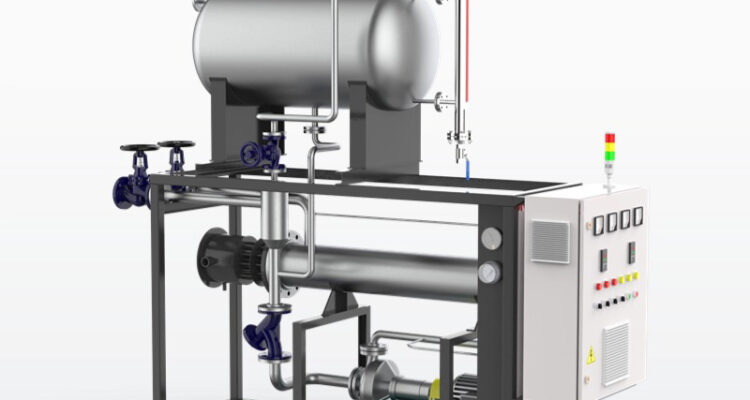
Pump Seal Failure Is the Top Offender
The circulation pump is the most active component in any thermal oil system, and it is also the most common source of leaks. Mechanical seals on hot oil pumps degrade fast because they operate under extreme conditions — high temperature, high pressure, and a fluid that breaks down over time and becomes abrasive. When the seal face wears, the carbon or ceramic ring loses its flatness, and oil starts seeping past.
At first it is just a drip. Then it becomes a steady weep. Then it turns into a stream that soaks the pump base and drips onto the floor. By the time you notice a puddle, the seal has already failed completely. The telltale sign is a wet footprint under the pump, or a gradual drop in system pressure that nobody investigates until the pump runs dry.
Flange and Gasket Leaks Along the Piping
Every connection point in the system is a potential leak site. Flanges, threaded fittings, and valve connections all rely on gaskets or O-rings to hold the oil in. Thermal cycling — the constant heating and cooling of the system — causes these gaskets to compress, relax, and eventually lose their seal. A flange that was tight at room temperature can develop gaps when the system reaches operating temperature because the metal expands unevenly.
The worst offenders are flanges near the heater outlet and the expansion tank connection. These areas see the highest temperatures and the most thermal stress. A blown gasket here does not just leak oil — it sprays hot oil under pressure, which is an immediate fire risk.
Heater Coil and Tube Failures
When the heating coils or tubes inside the heater vessel develop cracks or pinholes, oil leaks directly into the combustion chamber or the flue gas path. This is the most dangerous type of leak because the oil meets an open flame or a hot surface and ignites instantly. The fire does not start in the oil pan — it starts inside the heater itself, where you cannot see it until it is already burning.
Coil failures are almost always caused by carbon buildup. When degraded oil cracks and deposits carbon on the inside of the tubes, the metal overheats locally. The tube wall thins, develops stress cracks, and eventually ruptures. This can happen in as little as six months if the oil has not been changed and the system has not been cleaned.
Why Leaks Keep Coming Back After You Fix Them
You Are Treating the Symptom, Not the Root Cause
Most maintenance teams see a leak, replace the gasket or the seal, tighten the flange, and move on. The leak stops — for a while. Then it comes back in the same spot or somewhere else. This happens because the underlying cause was never addressed. A pump seal fails because the oil is abrasive from carbon contamination. You replace the seal, but the carbon is still there, so the new seal wears out in weeks. A gasket blows because of thermal cycling on an undersized heater. You replace the gasket, but the heater is still running too hot, so the next gasket blows too.
Stopping recurring leaks means fixing the system, not just patching the hole.
Thermal Expansion Is Pulling Connections Apart
Thermal oil systems operate at temperatures that cause significant metal expansion. A pipe run that is 10 meters long can expand by several centimeters when it heats up. If the piping is not designed with expansion loops, sliding supports, or flexible joints, this expansion puts enormous stress on every flange, every weld, and every fitting. Over time, the stress cracks the welds, pulls the flanges apart, and opens up paths for oil to escape.
Check the piping layout. If there are no expansion loops and the pipes are rigidly anchored at both ends, you have a system that is slowly tearing itself apart with every heat-up cycle.
How to Detect Leaks Before They Become Emergencies
Watch the Oil Level and Top-Up Frequency
The simplest leak detector is the expansion tank sight glass. If you are topping up oil every week when you used to top up every month, something is leaking. Do not ignore this. A slow leak that goes unnoticed for weeks can drain enough oil to expose the heating elements, which then overheat and fail catastrophically.
Use UV Dye for Hard-to-Find Leaks
For small seeps that you cannot see with the naked eye, add a UV-reactive dye to the thermal oil. Run the system for a few hours, then inspect every joint, flange, and fitting with a UV flashlight. The dye glows bright green wherever oil is escaping, even from hairline cracks. This catches leaks that would otherwise take months to discover.
Monitor System Pressure Drops
A sudden or gradual drop in system pressure — with no change in operating temperature — almost always means oil is leaving the system somewhere. Pressure does not drop for no reason. Investigate immediately.
Preventing Leaks From Happening in the First Place
Change the Oil on Schedule, Not When It Looks Bad
Waiting until the oil turns black before changing it is like waiting until your engine seizes before changing the oil. By the time the color changes, the oil has already produced significant carbon, sludge, and acidic byproducts that attack seals, gaskets, and tube walls. Follow the oil analysis schedule. Check the total acid number, the viscosity, and the flash point at regular intervals. Change the oil before it degrades, not after.
Inspect Pump Seals and Gaskets Proactively
Do not wait for a leak to replace a pump seal. Schedule seal inspections every six months. Measure the seal face for flatness, check the spring tension, and replace the seal at the first sign of wear. The cost of a new seal is nothing compared to the cost of a fire caused by a failed seal spraying hot oil onto a burner.
Install Leak Detection Sensors in Critical Zones
Place oil leak sensors on the floor beneath the pump, the heater, and the expansion tank. These sensors trigger an alarm the moment oil contacts the floor, giving you seconds to respond instead of minutes. In a system running at 300 degrees Celsius, those seconds matter.
Design the Piping for Thermal Movement
If you are building a new system or replacing old piping, make sure expansion loops are included in every long run. Use sliding supports instead of fixed anchors where possible. Flexible bellows at flange connections absorb movement and prevent the kind of stress cracking that causes flange leaks. This is not an extra cost — it is basic engineering that pays for itself in reduced downtime and zero leak incidents.
Related Posts