Accurately calculating the required heating capacity for a thermal oil heater is a foundational step…

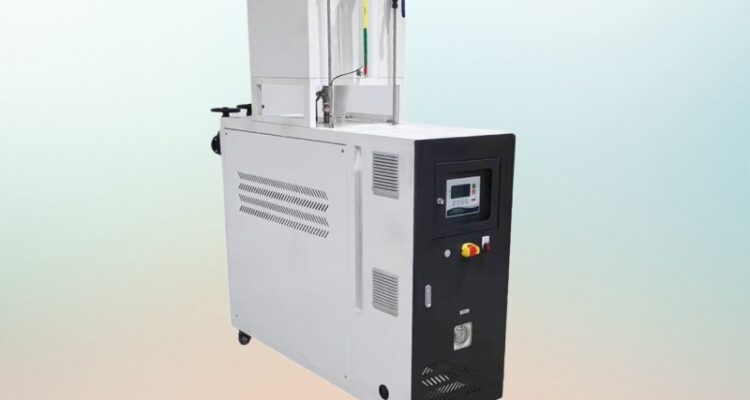
thermal oil heater skid mounted design
Thermal Oil Heater Skid Mounted Design: Why It Matters and How It Is Done Right
A skid mounted thermal oil heater is not just a heater bolted onto a steel frame. The skid is the entire system — heater, pump, expansion tank, controls, piping connections — all pre-assembled, pre-tested, and pre-piped on a single structural base. Ship it to site, bolt it down, connect the process lines, and run. That is the pitch. But getting the skid design right requires decisions that most people do not think about until something goes wrong. A poorly designed skid shows up as vibration, leaks, control drift, and maintenance nightmares. A well-designed skid runs quietly for years with almost no intervention.
What Actually Goes On a Thermal Oil Heater Skid
The skid frame is usually a welded steel structure sized to hold every component in one place. The heater sits on one end, the circulating pump on the other, the expansion tank somewhere in between. Controls, valves, and instrumentation get mounted on a panel attached to the frame. Piping between components is already done — no field welding, no field flanging, no guessing.
This sounds straightforward, but every component placement affects every other component. The pump must be close enough to the heater to minimize piping length, but far enough to avoid heat soak. The expansion tank must sit at the highest point on the skid, which means the frame has to be level or the tank will not vent properly. The control panel needs to be accessible but protected from heat and weather. These are not trivial layout questions. They determine whether the skid works or becomes a patchwork of afterthoughts.
Heater Placement and Orientation on the Skid
The heater is the heaviest component and usually the anchor point for the whole skid layout. It should sit near the center of the frame, not at one end, so the weight distributes evenly. A heater at the very end of a long skid creates a cantilever load that stresses the frame and causes flexing under vibration.
Orientation matters too. Most thermal oil heaters are vertical, with tubes running up and down. On a skid, the heater must be mounted so the oil outlet is above the inlet — natural circulation aid during startup. If the heater is mounted upside down or on its side, oil drainage during shutdown becomes a problem. Trapped oil degrades faster, and restarting a cold system with old oil in the tubes is a recipe for sludge.
The burner on a fired heater must face outward from the skid, not inward. Combustion air needs free access, and the flame should not impinge on any skid component. A burner tucked between the heater and the pump is a fire risk and a maintenance nightmare. Leave clearance on all sides of the burner — at least 1 meter if possible.
Pump Positioning and Piping Geometry
The circulating pump is usually the second heaviest component. It sits on the skid close to the heater, connected by short, straight pipe runs. Long piping between the heater and pump adds pressure drop, creates thermal expansion issues, and makes priming difficult.
The pump suction line must be as short and straight as possible. Every elbow, every valve, every meter of pipe adds friction loss. If the pump cavitates during startup, it is almost always because the suction piping was too long or too restrictive. On a skid, you have the advantage of keeping this run under 2 meters. Use that advantage.
Pump discharge piping should include a check valve and a gate valve for isolation. The check valve prevents backflow when the pump stops. The gate valve lets you isolate the pump for maintenance without draining the entire system. Both of these should be on the skid, pre-installed, not left for field work.
The pump itself needs a base plate bolted to the skid with vibration isolators. Thermal oil pumps run at high temperatures and generate vibration. Without isolators, that vibration transfers into the skid frame, loosens flanges, and cracks welds over time. Rubber or spring isolators rated for the pump weight and operating temperature are not optional.
Expansion Tank Location and Sizing on the Skid
The expansion tank is the most misunderstood component on a skid. It must sit at the highest point of the entire system — not just the highest point on the skid, but the highest point in the closed loop including the process piping. On the skid itself, this usually means the tank sits on top of the heater or on a raised platform.
If the tank is not the highest point, you need high-point vents in the process piping, which adds complexity and potential leak points. The whole point of a skid is to simplify the system. Do not undermine that by placing the expansion tank where it cannot do its job.
The tank must be large enough to handle the full thermal expansion of the oil from cold start to maximum operating temperature. A common mistake is undersizing the tank. If the tank is too small, oil overflows into the vent line during heat-up, and you lose oil. Losing oil means air enters the system, and air causes pump cavitation and hot spots. Size the tank for at least 25% to 30% of the total oil volume in the system.
The tank also needs a nitrogen blanket or a vent to atmosphere. A nitrogen-blanketed tank keeps oxygen out of the oil, which slows oxidation. An atmospheric tank vents to the outside, which is simpler but exposes the oil to air. For skids that sit outdoors, a nitrogen blanket is strongly recommended. Rain and moisture getting into an open expansion tank is a slow way to destroy your thermal oil.
Piping Layout on the Skid Itself
The piping between components on the skid is where most design mistakes happen. People think short runs mean simple runs. They do not. Short runs at high temperature mean thermal movement, and thermal movement means stress.
Every pipe run on the skid needs expansion loops or offset legs. A straight pipe from the heater outlet to the pump inlet will buckle when the oil heats up. The pipe grows, has nowhere to go, and bends. That bending stress cracks welds and loosens flanges. An expansion loop — a U-shaped bend in the pipe — gives the pipe room to grow without stressing the connections.
Pipe supports on the skid must be designed for thermal movement too. A rigid support that holds the pipe in place will transfer expansion force into the pump or heater nozzle. Use sliding supports or spring hangers where the pipe needs to move. Fixed supports go where the pipe does not need to move — typically near flanges and valves.
All piping on the skid should be flanged, not welded. Flanged connections allow disassembly for inspection and repair. If you weld the piping on the skid, you lose the ability to service individual components without cutting pipe. Every flange needs a gasket rated for the operating temperature. Spiral wound gaskets are standard for thermal oil service. Do not use rubber or PTFE gaskets above 200°C — they fail.
Valve Placement and Isolation Strategy
Every component on the skid needs isolation valves. The heater needs valves on both inlet and outlet. The pump needs a suction valve and a discharge valve. The expansion tank needs a drain valve and a vent valve. These are not extras. They are required for safe operation and maintenance.
The isolation valve on the heater outlet is the most critical. If the heater needs to be shut down for tube inspection, that valve lets you isolate the heater without draining the entire system. Without it, you drain hundreds of liters of hot oil every time you want to look at a tube. That is not practical, and operators will skip inspections, which is how failures happen.
A bypass line around the heater is another common skid feature. This lets you circulate oil through the system without passing it through the heater. It is used during startup to warm the oil slowly, and during maintenance to keep the process running while the heater is offline. The bypass line needs its own valve and should be sized for at least 50% of the pump capacity.
Drain valves must be at every low point on the skid. Oil does not drain itself. If there is no drain at the bottom of the pump suction line, oil sits there when the system shuts down. That stagnant oil degrades, forms sludge, and blocks the line on the next startup. A drain valve at every low point is cheap insurance.
Control Panel and Instrumentation on the Skid
The control panel is the brain of the skid. It should mount on the frame at a height that is easy to read and operate — roughly eye level for a standing operator. The panel must be weatherproof if the skid sits outdoors. NEMA 4 or IP65 rated enclosures are the minimum for outdoor installations.
The basic control loop includes an oil temperature sensor at the heater outlet, a pump run/stop signal, burner on/off control, and high-limit temperature protection. For fired heaters, add flame failure protection and fuel valve interlock. For electric heaters, add dry run protection and element failure alarm.
Do not put all the controls in one panel if the skid is large. Split the panel into sections — burner controls in one, pump controls in another, safety interlocks in a third. This makes troubleshooting easier and keeps a single fault from taking down the entire system.
Instrumentation should include oil temperature at the inlet and outlet of the heater, oil pressure at the pump discharge, and flue gas temperature for fired systems. These three readings tell you almost everything you need to know about system health. If outlet temperature is high but inlet temperature is normal, the heater is fouled. If pressure is low but temperature is normal, the pump is wearing out. If flue gas temperature is rising, tubes are dirty. Simple readings, powerful diagnostics.
Skid Foundation and Site Installation
The skid frame sits on a concrete foundation or steel support beams. The foundation must be level — within 2mm over the full length of the skid. An unlevel skid causes the expansion tank to sit off-center, which affects venting and oil level readings. It also creates uneven loading on the pump, which accelerates bearing wear.
Anchor bolts secure the skid to the foundation. Use chemical anchors or cast-in-place bolts, not just wedge anchors. Wedge anchors can loosen under vibration over time. Chemical anchors bond to the concrete and hold permanently.
Pipe connections from the skid to the process piping should use flexible connections — bellows or expansion joints — not rigid pipe. The skid and the process piping will move at different rates because they are at different temperatures. A rigid connection between them transfers stress into both systems. Flexible connections absorb that movement and protect everything.
Electrical connections to the skid must include a disconnect switch within sight of the skid. This lets you de-energize the entire system from one point for maintenance or emergency shutdown. The disconnect must be rated for the full load of the heater and pump combined.
Common Skid Design Mistakes That Cause Problems Later
Putting the expansion tank on the side of the skid instead of the top. This saves frame height but makes the tank the lowest point in some configurations, which defeats its purpose.
Skipping expansion loops on short pipe runs. Even a 1-meter pipe run at 300°C grows several millimeters. Without a loop, that growth has nowhere to go.
Using threaded connections on the skid piping. Threaded joints are not allowed in thermal oil service above certain temperatures and pressures. Everything must be flanged or welded.
Forgetting to insulate the skid piping. The pipes between the heater, pump, and tank carry hot oil. If they are not insulated, you lose heat, burn operators, and create a fire hazard near the control panel.
Oversizing the skid frame with no thought to weight distribution. A heavy heater on one end and a light pump on the other creates a seesaw effect. The frame flexes, bolts loosen, and alignment drifts.
Not including a drain connection on the expansion tank. When you need to change the oil, you need to drain the tank. No drain means you have to disconnect piping or tilt the whole skid. Neither option is fun.
When a Skid Mounted Design Makes Sense and When It Does Not
Skid mounted thermal oil heaters make the most sense for small to mid-size systems — typically up to 2 MW thermal output. Below that range, the skid approach saves installation time, reduces field labor, and gives you a factory-tested system. The upfront cost is higher than a stick-built system, but the installation savings usually pay for it.
For large systems above 3 MW, a skid becomes unwieldy. The frame gets too heavy to ship, the components do not fit on a single base, and the piping complexity exceeds what a skid can handle. At that size, a field-built system with component-by-component installation is more practical.
Skid mounted designs also work well for temporary or mobile applications. A rental thermal oil heater on a skid can be trucked to a site, set up in a day, and removed when the job is done. No permanent foundation, no field welding, no extended installation timeline.
They do not work well when the process piping is complex or when the heater needs to integrate with an existing system that has unusual layouts. A skid is a self-contained unit. It does not adapt easily to odd field conditions. If your process piping has tight turns, elevation changes, or non-standard connections, a custom field-built system may fit better.
The skid mounted thermal oil heater is not a compromise. It is a deliberate design choice that trades some flexibility for speed, quality, and reliability. Get the skid design right at the engineering stage, and the system installs cleanly and runs without surprises. Cut corners on the skid layout, and you pay for it during commissioning — or worse, during an unplanned shutdown months later.
Related Posts