Accurately calculating the required heating capacity for a thermal oil heater is a foundational step…
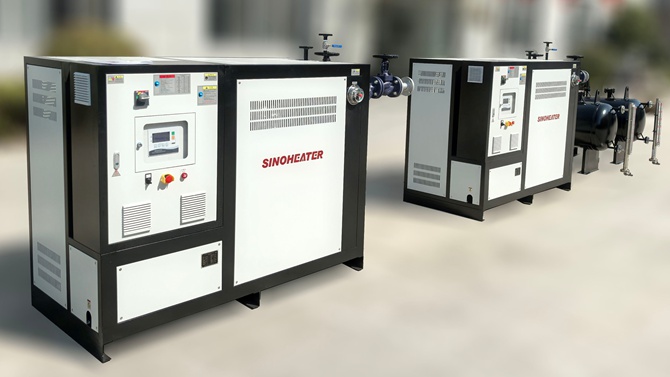
thermal oil heater burner adjustment
Thermal Oil Heater Burner Adjustment: A Practical Guide to Getting It Right
Adjusting the burner on a thermal oil heater is one of those tasks that sounds simple until you actually stand in front of the unit and realize a few wrong turns can cost you efficiency, safety, or both. Whether you are dealing with a gas-fired or oil-fired system, the burner is the heart of the whole operation. Get it wrong and your thermal oil heats unevenly, your fuel bills spike, and your system lifespan shrinks. Get it right and everything runs smooth, consistent, and safe.
Why Burner Adjustment Matters More Than Most People Think
A thermal oil heater is only as good as its combustion. The burner controls how fuel converts into heat, and that heat is what transfers to the thermal oil circulating through your system. If the flame is too rich, you waste fuel and create excess carbon buildup on the heat transfer surfaces. If the flame is too lean, you risk incomplete combustion, which means soot, carbon monoxide, and potential flame instability.
Most operators never touch the burner adjustment after initial startup. They set it and forget it. But fuel quality changes, ambient temperature shifts, and equipment ages. What was a perfect setting six months ago might be completely off today. That is why periodic burner adjustment is not optional — it is maintenance.
Understanding the Key Adjustment Points on Your Burner
Air-to-Fuel Ratio
This is the single most important setting on any thermal oil heater burner. The ratio of combustion air to fuel determines flame temperature, flame shape, and combustion efficiency. Too much air cools the flame and reduces heat transfer. Too little air creates a yellow, lazy flame that produces soot and wastes fuel.
On gas-fired units, you adjust this through the air damper — usually a lever or screw near the base of the burner head. On oil-fired units, it is controlled by the air register plates and the oil pressure nozzle combination. The goal is a sharp, blue flame for gas or a fine, even spray pattern for oil. If you see orange tips on a gas flame or heavy black smoke from an oil burner, the ratio is off and needs immediate correction.
Flame Size and Intensity
Flame size directly controls how much heat goes into the thermal oil. Most burners have a throttle or modulating valve that lets you increase or decrease flame intensity. On modulating burners, this can be done gradually — you are not just turning it on or off, you are dialing it in to match the current heat demand.
The adjustment is usually a simple turn of a knob or a slide on the control panel. But do not just crank it to maximum and assume more heat is better. Oversized flames create hot spots on the coil, which degrades the thermal oil faster and can damage the tube walls. Match the flame to the load, not the other way around.
Oil Pressure and Atomization Settings
For oil-fired thermal oil heaters, atomization is everything. The oil needs to be broken into a fine mist so it burns completely. If the oil pressure is too low, the droplets are too large and they do not burn fully — you get smoke, soot, and wasted fuel. If the pressure is too high, the spray pattern becomes too wide and hits the furnace walls, causing coking and uneven heating.
Most burners have a pressure adjustment screw on the oil pump or near the nozzle. Turn it in small increments — a quarter turn at a time — and watch the flame after each adjustment. You want a tight, conical spray pattern that burns cleanly with minimal smoke. It takes patience, but it is worth it.
Step-by-Step Burner Adjustment Process
Start With a Clean Burner
Before you adjust anything, make sure the burner is clean. Carbon deposits on the burner head, clogged nozzles, or blocked air passages will throw off every reading you take. Clean the burner head, check the nozzles for wear, and clear any debris from the air intake. Adjusting a dirty burner is like tuning an engine with a clogged air filter — you will never get it right.
Set the Baseline Air-Fuel Ratio
With the burner running at low fire, slowly open the air damper until you see the flame transition from yellow to blue. For gas burners, that transition point is your baseline. For oil burners, adjust the air register until the smoke disappears and the flame turns a steady blue-white. This is your starting point for all further adjustments.
Increase Fire Gradually and Observe
Raise the flame to about 75 percent capacity and hold it there for five to ten minutes. Watch the flame shape, color, and any smoke. If the flame lifts off the burner head, you have too much air. If it stays low and lazy, you need more air. Make small adjustments and re-check. Do not jump straight to full fire — you will overshoot and have to start over.
Fine-Tune for Your Specific Load
Once the baseline is set, adjust the flame to match your actual thermal oil temperature requirement. If your oil is running 10 degrees below target, increase the flame slightly. If it is overshooting, dial it back. The burner adjustment is not a one-time thing — it is an ongoing process that responds to load changes, fuel variations, and seasonal temperature shifts.
Common Mistakes That Ruin Burner Performance
Ignoring the Flame Color
Flame color tells you everything. Blue means clean combustion. Yellow or orange means incomplete combustion. White with smoke means you are flooding the burner with fuel. Most operators ignore these signals and just keep running. That is how you end up with coked tubes, degraded oil, and a furnace that needs expensive cleaning.
Adjusting Without a Combustion Analyzer
You can guess at the air-fuel ratio by looking at the flame, but you cannot confirm it without proper tools. A combustion analyzer measures oxygen, carbon monoxide, and stack temperature — giving you hard numbers instead of eyeball estimates. If you are running a thermal oil heater in any kind of industrial setting, this tool is not a luxury. It is a necessity.
Forgetting to Re-Adjust After Maintenance
Every time you service the burner, clean the nozzles, or replace parts, the air-fuel ratio changes. New nozzles have different flow characteristics. Cleaned burners have different airflow patterns. If you do not re-adjust after maintenance, you are running the heater on someone else’s settings — and that is a recipe for inefficiency or worse.
When to Call a Professional Instead of Adjusting Yourself
Some adjustments are beyond the scope of a routine check. If you are dealing with persistent flame instability, repeated ignition failures, or abnormal noise from the burner, stop and call a qualified technician. Modulating burners with complex control systems require specialized tools and training to adjust properly. Forcing an adjustment on a burner you do not fully understand can create unsafe conditions faster than it fixes them.
Burner adjustment is not rocket science, but it does demand attention to detail and a willingness to work in small increments. The thermal oil heater is a precision system — treat the burner with the respect it deserves and it will run clean, efficient, and reliable for years.
Related Posts